Tag: lifestyle

  • 20 Cute Desk Organization Ideas for a Pretty and Productive Workspace

    20 Cute Desk Organization Ideas for a Pretty and Productive Workspace

    As an Amazon Associate I earn from qualifying purchases.

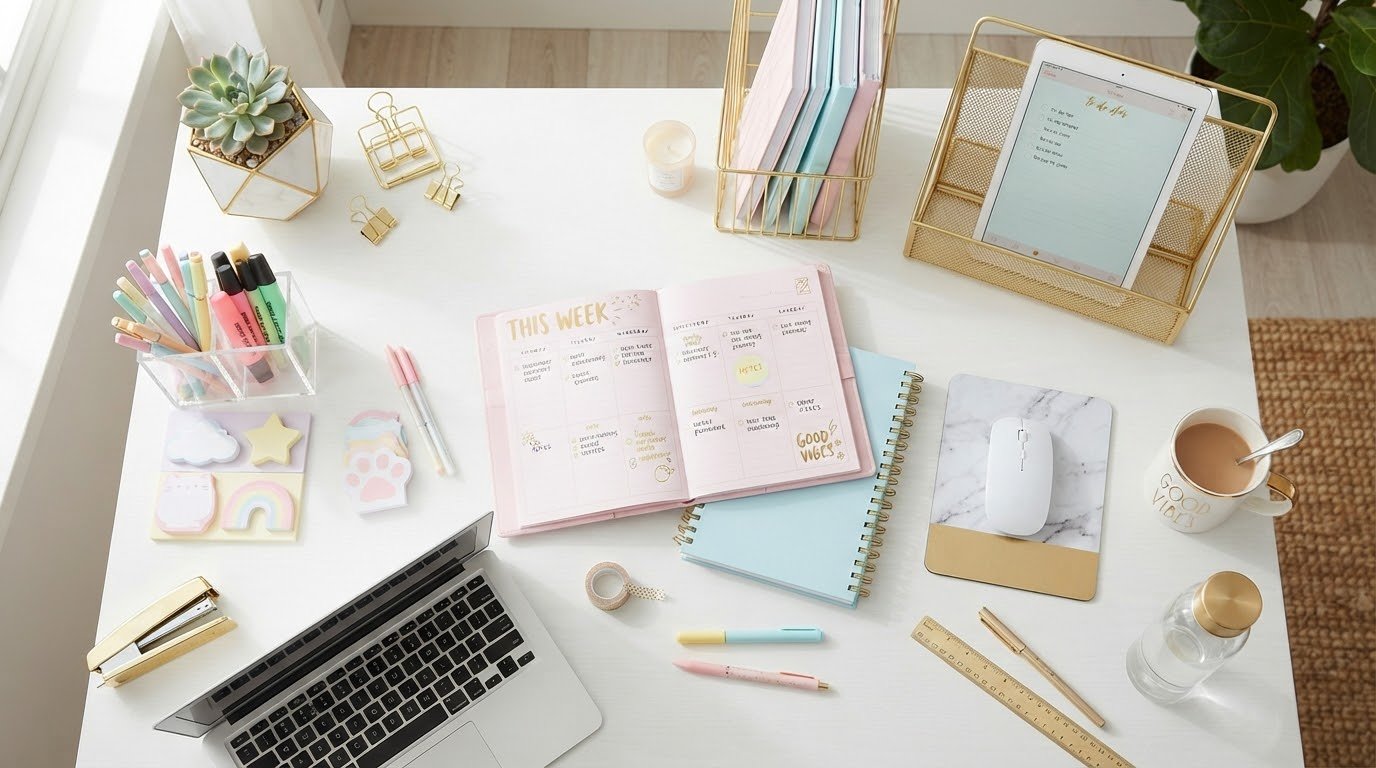
    A desk doesn’t have to look plain or boring to be organized. With a few thoughtful storage solutions, pretty stationery, and personal touches, you can create a workspace that feels both functional and inviting.

    Whether you’re working from home, studying, or managing everyday tasks, an organized desk can make it easier to find your supplies and keep distractions under control. You don’t need a large office or an expensive makeover, either. Sometimes, small changes can make the biggest difference.

    Here are 20 cute desk organization ideas to help you create a workspace that reflects your style while keeping everyday essentials within reach.

    1. Add a Cute Desk Calendar

    A desk calendar is a simple way to keep important dates, deadlines, and appointments visible. Choose a floral design, pastel colors, or a minimalist calendar that complements your workspace.

    Place it near your monitor or notebook so you can check your schedule easily. If you prefer a clutter-free desk, a small standing calendar can provide the same function without taking up too much room.

    Amazon idea: Browse cute desk calendars in styles that match your workspace.

    2. Use Stylish File Holders

    Loose papers can quickly make a desk look messy. File holders give documents, notebooks, and folders a designated place while keeping them easy to access.

    Neutral shades such as white, beige, and light gray create a clean look, while pastel or patterned designs can add personality. Use labels to separate work documents, bills, school notes, or important paperwork.

    Organization tip: Keep only frequently used papers on your desk. Store older documents elsewhere.

    Amazon idea: Explore desktop file organizers in compact designs.

    3. Arrange Stationery in Matching Containers

    Pens, pencils, markers, scissors, and highlighters are easier to find when they have a dedicated home. Instead of leaving them scattered across the desk, group them in cups, jars, or small containers.

    For a coordinated look, choose containers in two or three complementary colors. You can also reuse clean containers you already own instead of buying new ones.

    Amazon idea: Compare cute pen holders and stationery organizers for your desk.

    4. Keep Cables Neat with Cable Clips

    Charging cords and computer cables can make even a beautiful workspace look cluttered. Cable clips help keep frequently used cords in place and prevent them from sliding behind your desk.

    For several cables, consider a cable sleeve or an under-desk cable tray. Choose a solution that fits your setup and allows enough room to access plugs when needed.

    Organization tip: Unplug and identify unused cables before organizing the ones you still need.

    Amazon idea: Browse desk cable management accessories to find a suitable option.

    5. Create a Matching Desk Organizer Setup

    A coordinated organizer set can make your workspace look more intentional. Consider combining a pen holder, paper tray, small storage box, and file holder in similar colors or materials.

    You don’t need every piece from one collection. Choose only the organizers that solve a real problem and fit your available desk space.

    Amazon idea: Explore matching desk organizer sets in minimalist or pastel styles.

    6. Organize Small Items in Drawer Dividers

    Paper clips, sticky notes, USB drives, and spare batteries are easy to lose in a cluttered drawer. Drawer dividers create separate spaces for small items, making them easier to find.

    Measure your drawer before buying anything. Adjustable dividers can be useful when your supplies vary in size, while small bins work well for grouping similar items.

    Organization tip: Give each compartment a specific purpose and return items to the same place after use.

    Amazon idea: Compare drawer organizers for office supplies.

    7. Add a Small Plant or Decorative Planter

    A small plant can add a natural touch to a desk filled with screens and stationery. If your workspace receives enough suitable light, consider a low-maintenance plant that fits the conditions.

    Prefer something that requires little care? An artificial plant can provide a similar decorative effect without needing watering.

    Keep plants away from electronics and choose a stable, leak-resistant pot.

    8. Use a Catch-All Tray for Everyday Essentials

    Keys, earbuds, lip balm, USB drives, and other small items often end up scattered around a desk. A small catch-all tray gives these everyday belongings one convenient place.

    Choose a tray that fits the items you actually use. A simple ceramic, wooden, or acrylic design can look attractive without overwhelming your workspace.

    Amazon idea: Browse small desktop catch-all trays for a neat landing spot for daily essentials.

    9. Make Use of Vertical Space with Wall Shelves

    When desk space is limited, look upward. Wall shelves can hold books, storage boxes, framed prints, and decorative pieces without occupying the work surface.

    Arrange heavier items according to the shelf’s weight rating and follow the manufacturer’s mounting instructions. If you rent your home, check whether your wall and lease allow drilling before installing shelves.

    Organization tip: Keep frequently used supplies within easy reach and reserve higher shelves for items you rarely need.

    Amazon idea: Explore small wall shelves for home offices.

    10. Elevate Your Laptop with a Stand

    A laptop stand can raise your screen and free up space underneath for a keyboard, notebook, or other accessories. This can be particularly helpful when working from a compact desk.

    Look for a stable design that supports your laptop’s size and weight. If the laptop is raised for extended work, an external keyboard and mouse can help you position your hands separately from the screen.

    Amazon idea: Compare laptop stands for desk setups based on adjustability, stability, and dimensions.

    11. Choose a Desk Mat That Matches Your Style

    A desk mat can visually define your work area and provide a smooth surface for your keyboard, mouse, or notebook. It can also help protect the desk from everyday wear.

    Neutral, floral, pastel, and minimalist designs are all options. Measure your available space and consider whether you want the mat to fit only your mouse or cover a larger portion of the desk.

    Amazon idea: Browse aesthetic desk mats in colors and sizes that suit your setup.

    12. Keep Sticky Notes in One Place

    Sticky notes are useful for quick reminders, but too many scattered notes can create visual clutter. Store unused notes in a small holder and use a limited section of your desk or wall for active reminders.

    For longer task lists, a notebook or digital planner may work better than adding more sticky notes.

    Organization tip: Review your reminders at the end of the day and remove notes that are no longer needed.

    13. Improve Your Lighting with a Desk Lamp

    A desk lamp provides focused light for reading, writing, and reviewing documents. Choose an adjustable lamp that directs light onto your work area without causing distracting reflections on your screen.
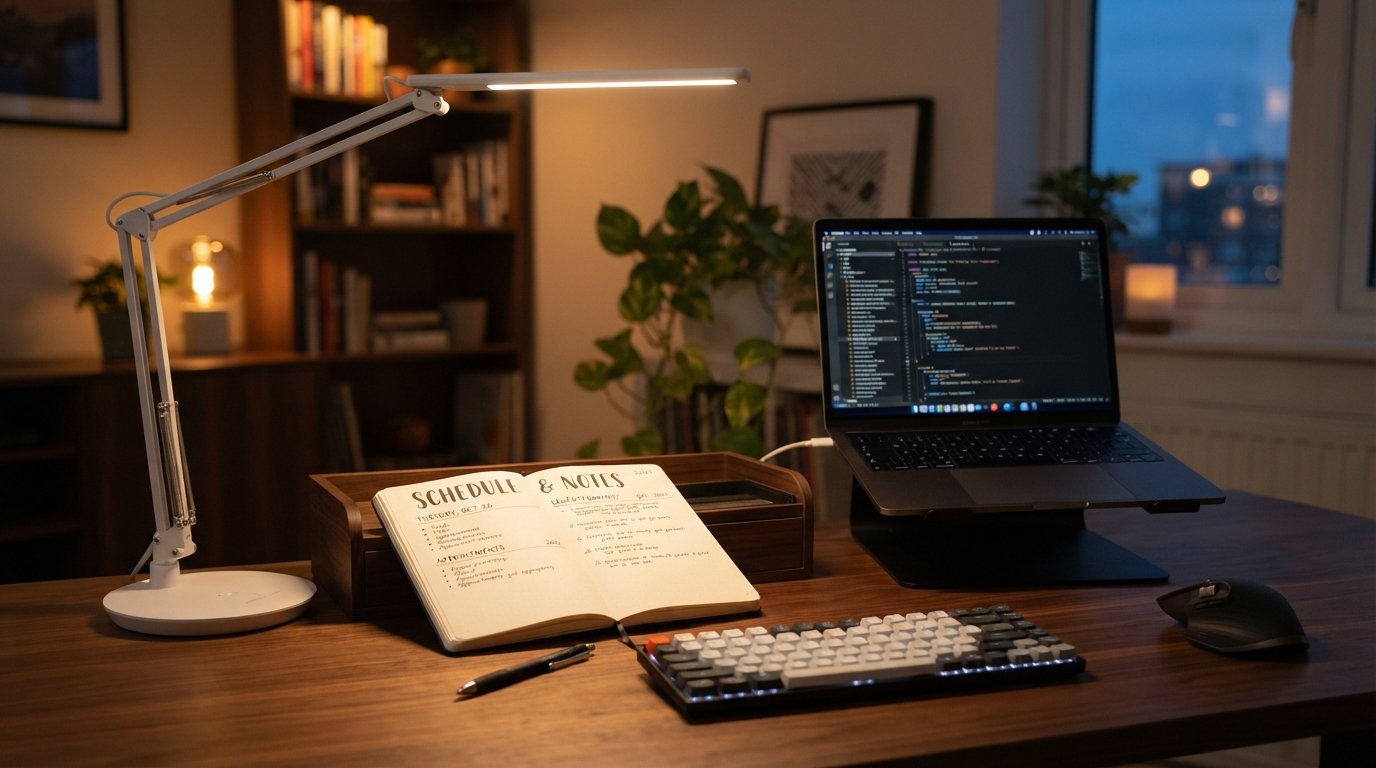
    If your desk is small, consider a compact lamp or a suitable clamp-on model. Check the lamp’s dimensions, brightness settings, and bulb requirements before purchasing.

    Amazon idea: Compare adjustable desk lamps for your workspace.

    14. Store Extra Supplies in Decorative Boxes

    Not every office supply needs to remain visible. Decorative boxes can hold spare notebooks, cables, printer paper, and other items you use occasionally.
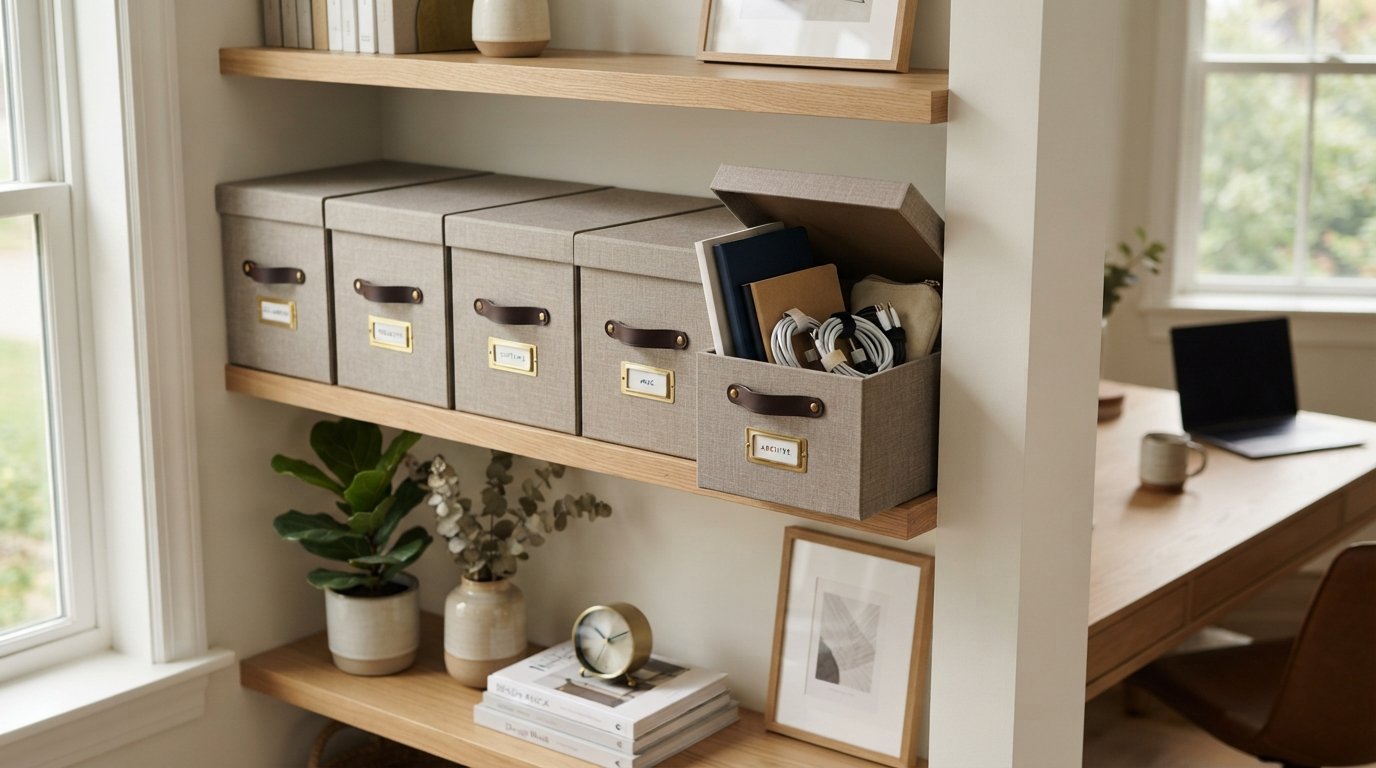
    Choose boxes that fit your shelves or desk drawers, and label them so you can find things without opening every container. Matching boxes can also make open shelving look less cluttered.

    Amazon idea: Browse decorative storage boxes in sizes suited to your shelves.

    15. Personalize Your Space with a Small Bulletin Board

    A bulletin board gives you a place for reminders, notes, photographs, and inspiration. It can also keep loose papers off your desk.
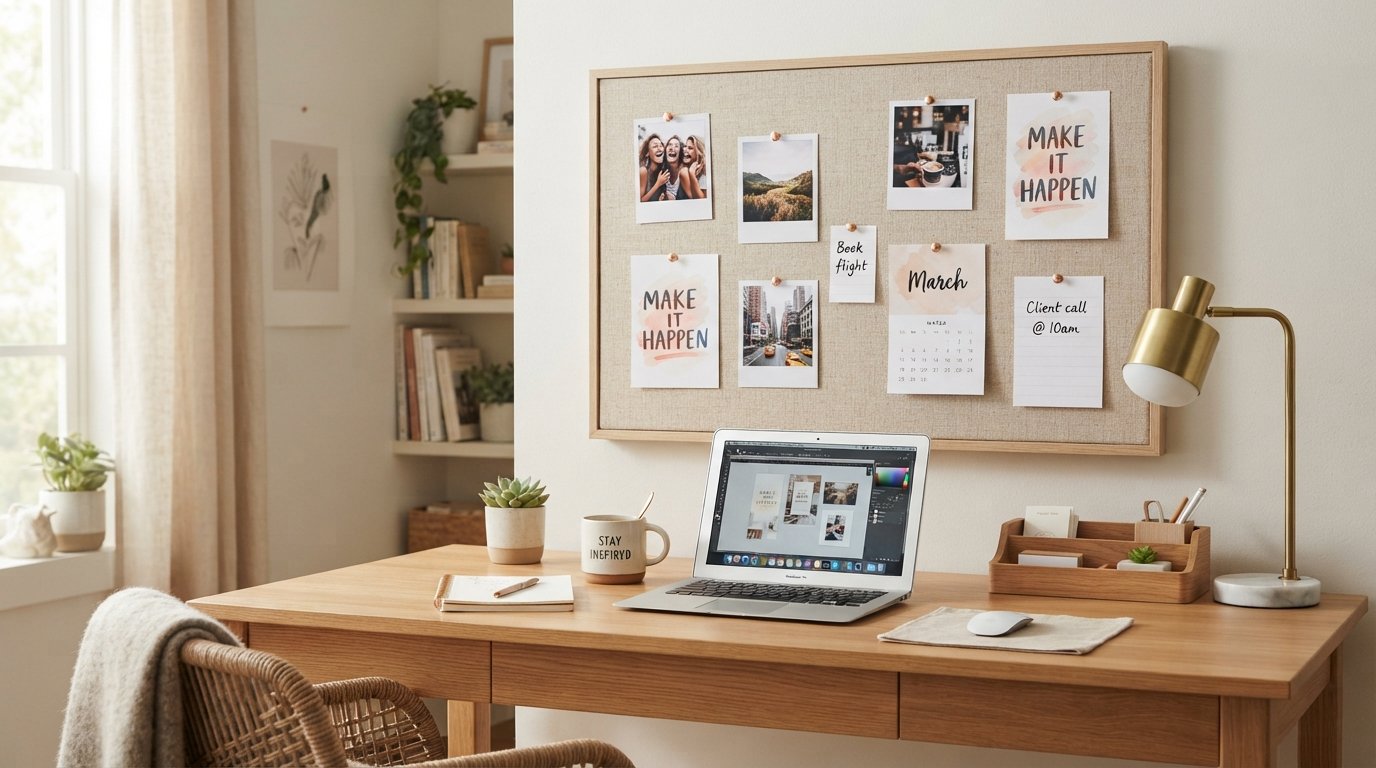
    Choose a corkboard, fabric board, or magnetic board based on your needs. Keep the display selective so it remains useful rather than becoming another place for clutter.

    Organization tip: Reserve the board for current projects, meaningful reminders, and a few favorite images.

    16. Add a Headphone Stand or Hook

    Headphones can take up valuable desk space when they’re not in use. A headphone stand keeps them in one place, while a suitable desk-mounted or under-desk hook can be a space-saving alternative.
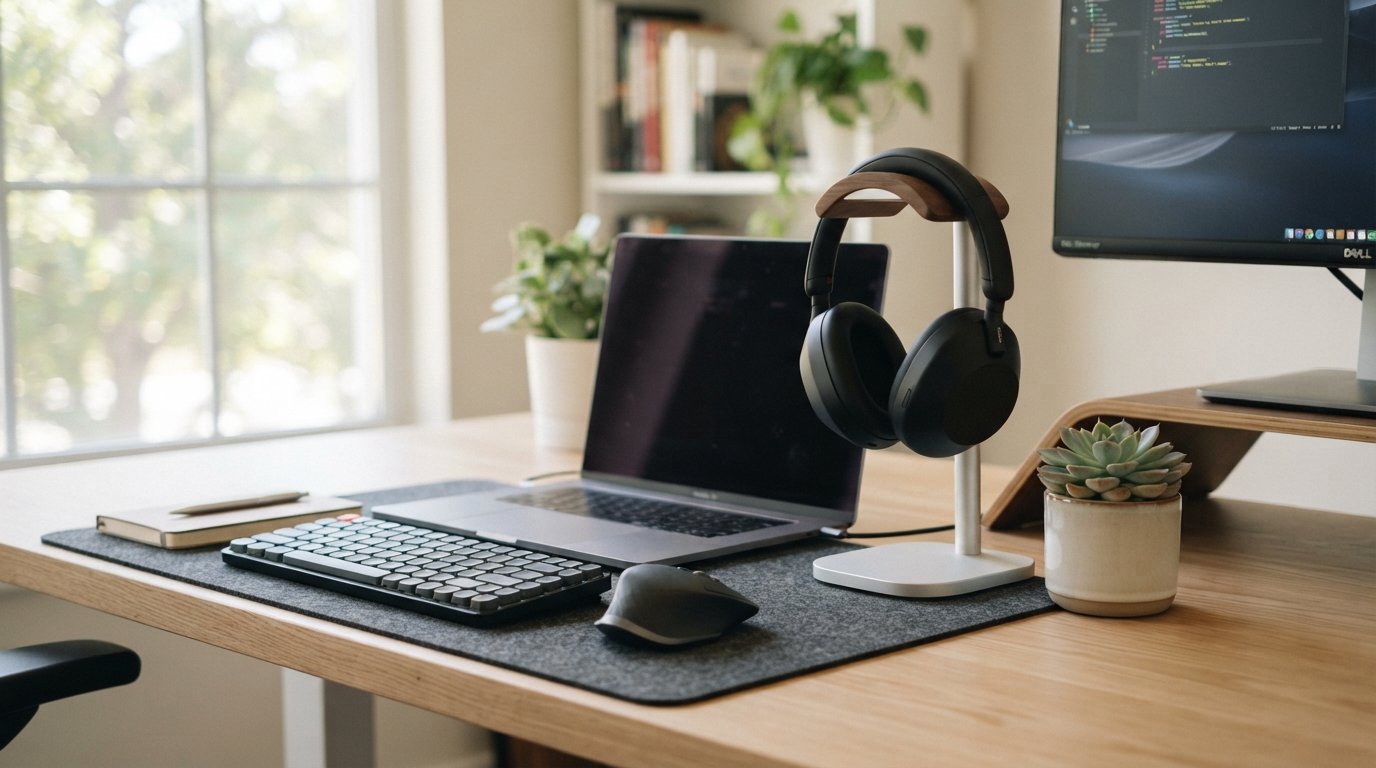
    Before buying a hook, check that its mounting method works with your desk and won’t damage the surface.

    Amazon idea: Explore headphone stands and desk hooks that suit your setup.

    17. Use a Small Whiteboard for Daily Priorities

    A compact whiteboard can help you keep track of tasks, deadlines, and reminders. Write down only the most important items for the day instead of copying your entire to-do list onto the board.

    Place it somewhere visible without blocking your monitor or taking up essential work space. Erase completed tasks regularly to keep it clear.

    18. Make a Pretty and Practical Charging Station

    Phones, earbuds, smartwatches, and other devices can create a tangle of charging cables. A charging station or small charging organizer can keep compatible devices together.

    Check device compatibility, power requirements, and cable lengths before purchasing. Avoid overloading outlets, and follow the charging accessories’ safety instructions.

    Amazon idea: Compare desktop charging stations and cable organizers based on your devices.

    19. Coordinate Your Office Supplies by Color

    Color coordination can make your desk look more cohesive without requiring expensive accessories. Pick two or three colors and use them across your pen holders, notebooks, file organizers, and desk mat.
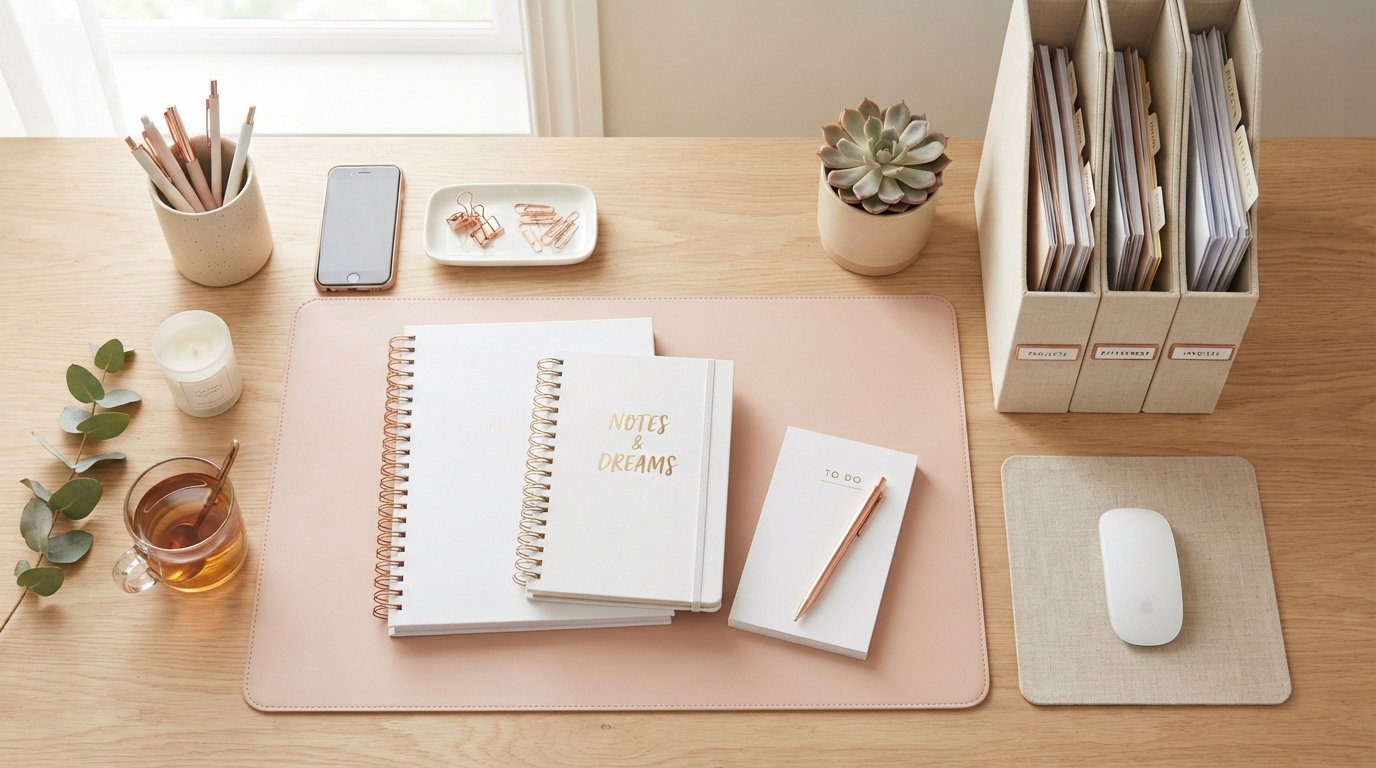
    For a soft look, try white with beige and blush pink. For a simple modern setup, consider white, gray, and light wood.

    You don’t need to replace everything you own. Start by grouping existing supplies by color and add new pieces only when something needs replacing.

    20. Try DIY Desk Organizers on a Budget

    You can organize a workspace without buying a complete set of accessories. Clean jars can hold pens, sturdy boxes can separate drawer supplies, and small containers can store paper clips and other tiny items.
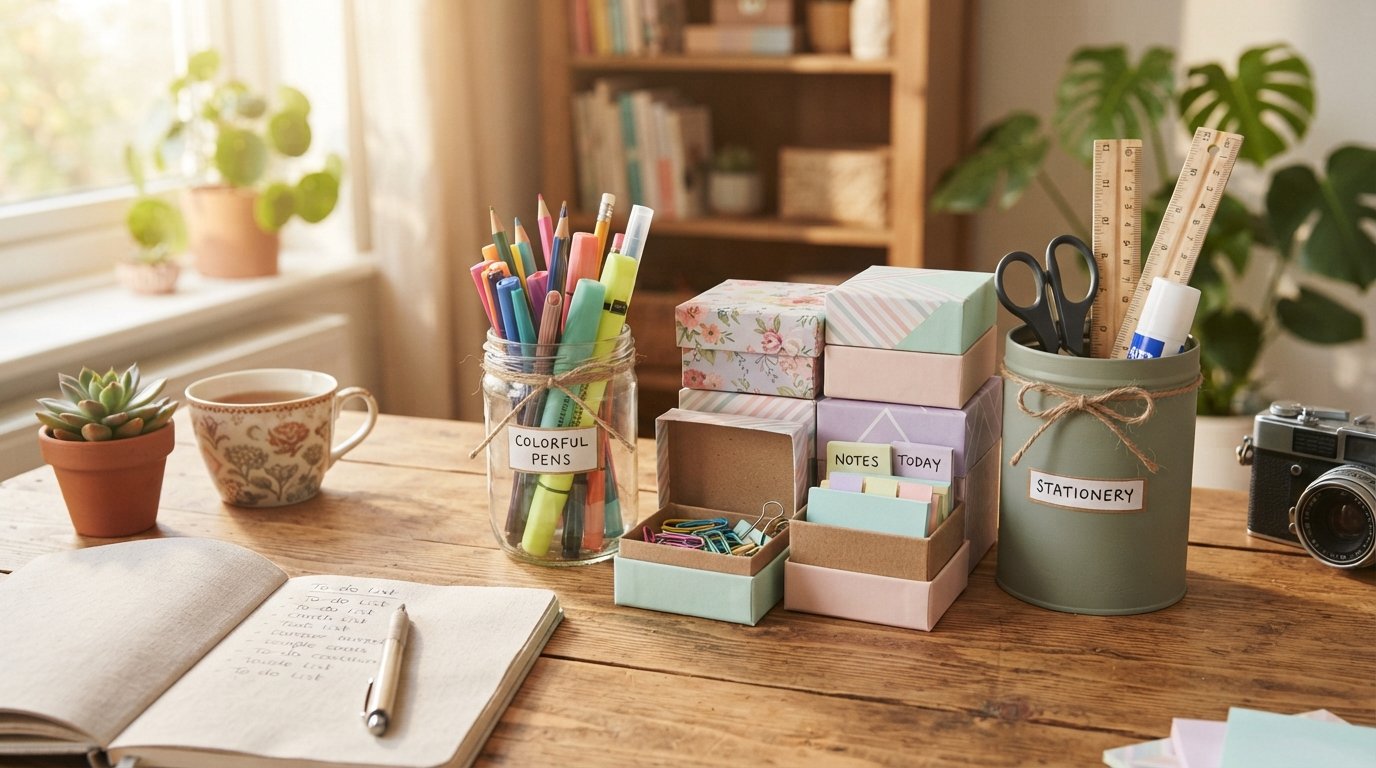
    Cover plain boxes with paper or fabric that matches your desk, or reuse containers you already have. Make sure everything is clean, stable, and suitable for the items you’re storing.

    Budget tip: Spend first on solutions that address daily problems, such as a drawer divider or cable clip, before buying purely decorative accessories.

    How to Keep Your Cute Desk Organized

    Once your desk looks the way you want, a few small habits can help you maintain it.

    • Clear the surface at the end of the day. Return stationery, cups, and accessories to their designated places.
    • Keep everyday essentials nearby. Store less frequently used supplies in drawers or on shelves.
    • Avoid overdecorating. Leave enough clear space for your actual work.
    • Review your storage every week. Remove empty packaging, old notes, and items you no longer need.
    • Buy with a purpose. Before purchasing an organizer, identify exactly what you want it to store.

    Final Thoughts

    A cute desk can also be a practical one. With a few well-chosen organizers, tidy cables, useful lighting, and personal details, you can create a workspace that feels comfortable and reflects your style.

    Start with what you already own, identify the biggest source of clutter, and make small improvements one at a time. You don’t need to buy all 20 items to create a desk you’ll enjoy using.
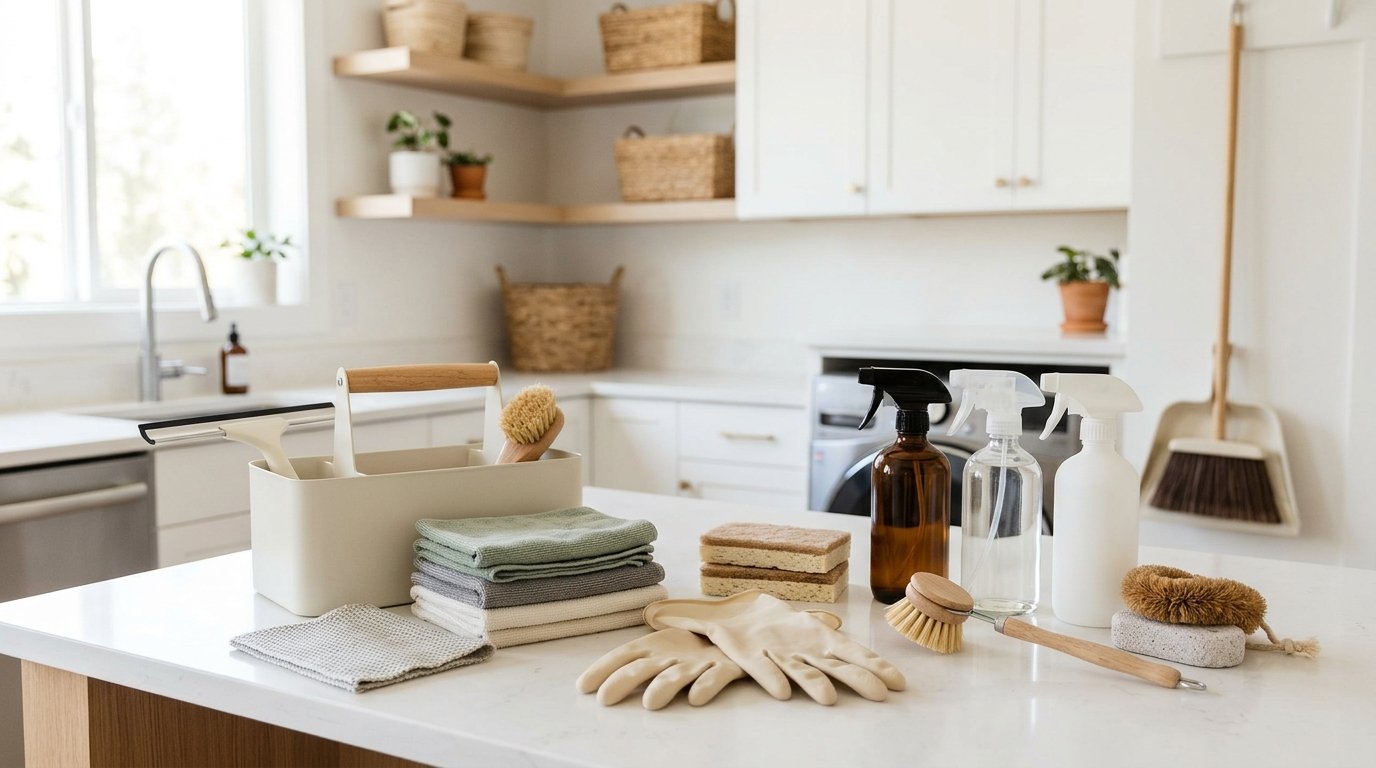
  • 12 Essential Cleaning Supplies Every Home Should Have

    12 Essential Cleaning Supplies Every Home Should Have

    As an Amazon Associate I earn from qualifying purchases.

    Keeping a home clean doesn’t have to mean filling your cabinets with dozens of cleaning products and tools. Often, a small collection of useful supplies is enough to handle everyday messes and make household chores more manageable.

    Whether you’re setting up your first home or simplifying your current cleaning routine, it helps to know which items are worth keeping on hand. The right supplies depend on your home’s surfaces, your cleaning habits, and the kind of messes you deal with most often.

    Here are 12 practical cleaning supplies to consider, along with tips for choosing and using them.

    1. Microfiber Cleaning Cloths

    Microfiber cloths (visit link) are useful for wiping countertops, dusting furniture, and cleaning many everyday surfaces. They’re reusable, easy to wash, and can help reduce the need for disposable paper towels.

    Keep a few cloths available for different tasks, such as kitchen surfaces, bathroom cleaning, and general dusting. Washing them regularly helps prevent dirt from being spread from one area to another.

    Helpful tip: Follow the manufacturer’s washing instructions, and avoid fabric softener if the cloth’s care label advises against it.

    2. An All-Purpose Cleaner

    An all-purpose cleaner can be convenient for routine cleaning when it’s suitable for the surface you’re working on. Depending on the product, it may be useful for certain countertops, washable surfaces, and everyday household messes.

    You don’t necessarily need several similar sprays. Start by checking which surfaces in your home need regular attention, then choose a cleaner labeled for those materials.

    Helpful tip: Always read the product label, test an inconspicuous area when appropriate, and never mix cleaning products.

    3. Scrub Brushes

    A good scrub brush can help remove stubborn dirt from suitable surfaces where a cloth alone isn’t enough. Smaller brushes are useful around taps, sink edges, and other tight areas, while larger brushes may work better for broader surfaces.

    Choose bristles that suit the task. Softer bristles may be appropriate for delicate finishes, while tougher brushes should only be used on surfaces that can tolerate them.

    Helpful tip: Rinse brushes after use and let them dry thoroughly to help keep them clean between tasks.

    4. Non-Scratch Sponges

    Sponges are handy for washing dishes and cleaning certain kitchen and bathroom surfaces. A non-scratch sponge (visit link) can be useful when you want to avoid damaging a finish, but it isn’t automatically safe for every material.

    Check the sponge packaging and the surface manufacturer’s care instructions before using it on nonstick cookware, polished fixtures, or delicate finishes.

    Helpful tip: Rinse sponges well after use, allow them to dry, and replace them when they become worn or develop persistent odors.

    5. A Cleaning Caddy

    A cleaning caddy keeps frequently used supplies together, making it easier to carry them from room to room. It can also help prevent bottles, cloths, and brushes from becoming scattered in different cupboards.

    You don’t need a large or elaborate organizer. Choose one with enough room for the supplies you regularly use, a comfortable handle, and a design that’s easy to wipe clean.

    Helpful tip: Store chemicals in their original containers, keep them upright, and never put incompatible products together in a way that risks leaks or accidental mixing.

    6. Rubber Cleaning Gloves

    Reusable household cleaning gloves can help protect your hands from dirt, moisture, and some cleaning products. They may be particularly useful for washing dishes, cleaning bathrooms, or handling products that specify gloves should be worn.

    Choose gloves that fit comfortably and are appropriate for the cleaning tasks you do. Keep in mind that ordinary household gloves aren’t suitable protection against every chemical.

    Helpful tip: Follow the cleaning product’s safety instructions, and rinse and dry your gloves after use.

    7. A Glass Cleaning Cloth

    Glass surfaces, mirrors, and windows can show streaks and fingerprints easily. A suitable glass-cleaning cloth can help with routine wiping and may reduce the need for disposable paper towels.

    Some microfiber cloths are designed specifically for glass, so look for one that matches your needs. For the best results, use the cleaning method recommended for the particular glass or mirror surface.

    Helpful tip: Use a clean cloth rather than one that has collected grease or residue from other cleaning tasks.

    8. A Floor Mop That Suits Your Flooring

    A mop can make routine floor cleaning easier, but the right choice depends on your flooring and the manufacturer’s care instructions.

    A flat mop may be convenient for everyday dust and light dirt, while other mop styles may suit different floor types. Consider how easy the mop head is to wash, replace, and store.

    Helpful tip: Avoid using excessive water on wood, laminate, or other moisture-sensitive flooring. Use only cleaning products and methods approved for your floor.

    9. A Broom and Dustpan

    A broom and dustpan remain useful for collecting crumbs, dust, and loose debris from floors. They’re especially convenient for quick cleanups after cooking, eating, or doing crafts.

    Choose a broom that suits your floor type and has bristles that can reach the areas you need to clean. A dustpan with a comfortable handle can make collecting debris less awkward.

    Helpful tip: Sweep dirt into a manageable pile and empty the dustpan promptly rather than leaving debris around the room.

    10. A Lint Roller

    A lint roller is a handy tool for picking up loose hair, lint, and small particles from suitable fabrics. It can be useful for clothing, cushions, and certain upholstered surfaces.

    If you have pets or frequently deal with lint, keeping one near your entryway or laundry area may make quick touch-ups more convenient.

    Helpful tip: Check the fabric care instructions before using an adhesive roller on delicate materials, since some fabrics may snag or be affected by the adhesive.

    11. A Grout Cleaning Brush

    A narrow grout brush can help reach the lines between tiles and other small spaces that are difficult to clean with a larger brush. It may be useful in bathrooms and kitchens where compatible tiled surfaces need occasional attention.

    Choose a brush designed for the surface you’re cleaning, and avoid aggressive scrubbing that could damage grout or surrounding finishes.

    Helpful tip: Use a cleaning product approved for your tile and grout, follow the label instructions, and provide suitable ventilation when required.

    12. Reusable Cleaning Cloths or Mop Pads

    Reusable cloths and washable mop pads can be practical alternatives to disposable cleaning materials for many routine tasks. Having a small supply means you can use a clean cloth when needed without having to wash it immediately.

    Keep used cloths separate from clean ones until laundry time. Wash them according to their care instructions, particularly after cleaning greasy or heavily soiled areas.

    Helpful tip: Assign cloths to particular tasks or rooms to reduce the risk of transferring dirt between surfaces.

    How to Build a Cleaning Kit Without Overspending

    You don’t need to buy all 12 items at once. Start with the supplies that address your most common household tasks, such as a few microfiber cloths, a suitable cleaner, a sponge, and a broom.

    Before purchasing anything new, check what you already own. You may only need to replace worn tools or add one item that solves a specific problem.

    When comparing products, consider durability, ease of cleaning, storage space, and whether the item is appropriate for your home’s surfaces. A simple, well-chosen cleaning kit is often more useful than a cabinet full of supplies you rarely use.

    Final Thoughts

    A manageable cleaning routine starts with tools that suit your home and the tasks you do regularly. Microfiber cloths, brushes, a caddy, and the right floor-cleaning tools can help you stay prepared without making cleaning more complicated than it needs to be.

    Start with the basics, keep your supplies clean and organized, and add new items only when they serve a clear purpose. The goal isn’t to own more cleaning products—it’s to make everyday cleaning easier to manage.

    Disclosure: As an Amazon Associate I earn from qualifying purchases.

  • Coffee Bar Essentials: 12 Things to Create Your Own Coffee Station

    Coffee Bar Essentials: 12 Things to Create Your Own Coffee Station

    As an Amazon Associate I earn from qualifying purchases.

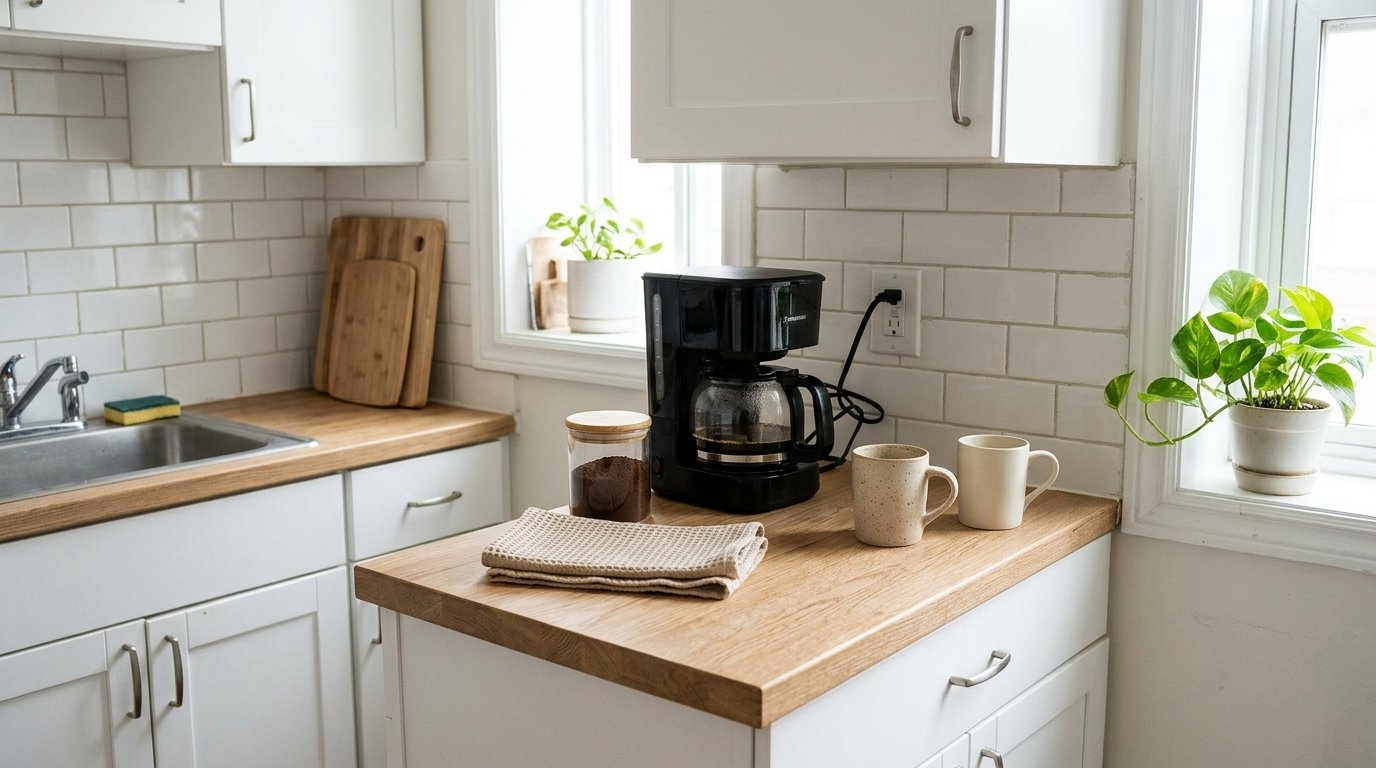
    There’s something comforting about having a little coffee corner at home. Maybe it’s the first cup you make in the morning, a quiet afternoon latte, or the familiar routine of preparing your favorite drink before starting the day.

    Whatever your coffee ritual looks like, a dedicated coffee station can make that everyday moment feel a little more special.

    And no, you don’t need a huge kitchen or a perfectly styled café setup to create one. A small section of your countertop, an unused corner, or even a simple shelf can become a coffee spot that fits your home and your routine.

    If you’re dreaming of creating your own, here are 12 ideas to help you put together a coffee station that feels inviting, organized, and uniquely yours.

    1. Start with a Coffee Maker You Love Using

    Your coffee maker doesn’t have to be fancy. What matters most is finding one that suits the way you actually drink coffee.

    If you enjoy several cups throughout the morning, a drip coffee maker might make sense. If you usually prepare one cup at a time, a single-serve machine can be convenient. And if making espresso or lattes is your favorite part of the day, an espresso machine may be worth considering.

    Think about your usual routine before choosing one. A machine that fits your habits will likely get more use than one that simply looks good on the counter.

    2. Give Your Coffee Beans a Proper Home

    Coffee beans and ground coffee are part of the experience, so it helps to store them properly. An airtight container can keep coffee organized and protect it from excess air and moisture.

    You don’t need a row of matching jars to make your station look beautiful. One practical container, placed away from heat and direct sunlight, can be enough.

    Choose a size that matches how much coffee you normally keep on hand, rather than buying a large container that stays mostly empty.

    3. Display a Few Favorite Mugs

    Mugs can add personality to a coffee station. Maybe you have a favorite oversized mug, a handmade ceramic cup, or a set that matches your kitchen.

    Instead of displaying every mug you own, choose a few you use regularly. A small mug tree, a shelf, or a convenient cabinet can keep them accessible without making the space feel crowded.

    The best display is one that looks nice and still makes your morning routine easier.

    4. Use a Tray to Bring Everything Together

    A simple tray can make a coffee corner feel more intentional. Place your everyday essentials on it, such as sugar, a spoon holder, or a small jar of coffee accessories.

    It also creates a natural boundary for smaller items, which can help prevent them from spreading across the entire countertop.

    Wood adds warmth, while white or neutral trays can create a cleaner, more minimal look. Use whatever complements the items you already have at home.

    5. Make Room for Your Favorite Coffee Pods

    If you use a single-serve coffee machine, you’ve probably noticed how quickly coffee pods can accumulate in a drawer or box.

    A small holder can make your options easier to see and keep the counter more organized. Drawer-style holders work well for some setups, while vertical holders may suit narrower spaces.

    Before choosing one, check that it fits your specific pod type. You can also keep the original packaging in a cabinet if you’d rather not add another accessory to your counter.

    6. Create Your Own Little Latte Corner

    If you enjoy making lattes or cappuccinos, you might like having a small area dedicated to milk and coffee preparation.

    Keep the tools you actually use together, whether that’s a milk frother, a small pitcher, or your favorite latte glass. Leave enough room to prepare your drink comfortably and clean the equipment afterward.

    You don’t need professional barista equipment to enjoy a homemade latte. Start with your current routine and add tools only if they would make it easier or more enjoyable.

    7. Keep Syrups Within Easy Reach

    Vanilla, caramel, and other coffee syrups can be fun additions if you enjoy flavored drinks. Keeping the bottles together makes it easier to find your favorite flavor without searching through kitchen cabinets.

    If you have several bottles, a small riser or organizer can help you see them more clearly. But if you only use one or two syrups, a simple spot on the counter may be all you need.

    The idea is to organize the things you enjoy—not create extra clutter just to make the coffee bar look complete.

    8. Make Use of a Small Rolling Cart

    A rolling cart can be helpful when your kitchen doesn’t have much free counter space. It gives you a separate place for coffee equipment and supplies without requiring a permanent installation.

    You could keep the coffee maker on top and use the lower shelves for mugs, napkins, filters, and backup supplies.

    Before setting one up, check the cart’s stability and weight capacity. Make sure the coffee machine can be used safely near a suitable outlet, and keep cords away from walkways.

    9. Give Your Coffee Station Some Vertical Space

    If your countertop is small, look upward. A shelf or secure wall-mounted mug rack can provide extra storage without taking up more working space.

    Use shelves for lightweight items you can comfortably reach, such as mugs and coffee containers. Leave enough clearance above the coffee maker and follow the installation instructions for the wall and mounting hardware.

    Even one well-placed shelf can make a small coffee corner feel more organized.

    10. Let Your Coffee Bar Reflect Your Style

    Your coffee station doesn’t have to look like anyone else’s. If you love a modern look, try clean lines and a few neutral accessories. If you prefer something warmer, wood tones and handmade mugs may suit you better.

    You can also add a small framed print, a favorite piece of pottery, or a plant if the location has suitable light.

    Start with the style of your existing kitchen so the coffee corner feels like part of your home rather than a separate display.

    11. Keep the Little Things Organized

    Coffee filters, teaspoons, stirrers, napkins, and sweetener packets are easy to overlook when planning a coffee station. But these small items can quickly make the countertop feel messy.

    A small drawer organizer or a few reusable containers can help keep them together. You might also store less frequently used supplies in a nearby cabinet and leave only everyday essentials within reach.

    You don’t need a special organizer for everything. Reusing containers you already own can work just as well.

    12. Make Your Coffee Station Work for Your Space

    Perhaps the most important part of creating a coffee bar is making sure it works for your home.

    A spacious kitchen might have room for an espresso machine, grinder, and several accessories. A small apartment may need only a compact coffee maker and two mugs on a narrow shelf.

    Neither setup is better than the other. The right coffee station is one that fits your space, your budget, and the way you enjoy coffee.

    Start with what you have, make small adjustments as needed, and let the setup evolve over time.

    Final Thoughts

    A home coffee station doesn’t need to be elaborate to feel special. Sometimes, a coffee maker, a favorite mug, and a tidy place for your supplies are all you need.

    Take a look at your current coffee routine and think about what would make it more convenient. Maybe you need a better place for your mugs, a way to organize coffee pods, or simply a little more room on the counter.

    Start there. Add only what makes sense for your home, and enjoy creating a coffee corner that feels like yours.

    Frequently Asked Questions

    What do I need for a basic coffee station?

    Start with your preferred coffee-making method, a few mugs, and a convenient place for your coffee and supplies. Everything else is optional.

    Can I create a coffee bar in a small kitchen?

    Absolutely. A countertop corner, narrow shelf, or compact cart can work well. Measure your available space before choosing equipment.

    How can I make my coffee bar look nice without spending much?

    Use items you already own, group small accessories together, and keep the surface uncluttered. A favorite mug or simple tray can be enough to bring the setup together.

    Do I need special coffee bar accessories?

    Not necessarily. Accessories are useful when they solve a problem or make your routine more convenient. You can always add them later.